Docker Installation
Docker Installation - Mac
The easiest way to install Docker on a Mac system is to install the Docker Desktop software. To do so, visit the official Docker website's Get Started section and install the Docker Desktop.
After the installation, everything should be running smoothly.
Info
Note that you need to start and keep the Docker Desktop running while using Docker.
Docker Installation - Windows (WSL)
Luckily, Docker Desktop software also supports WSL 2 out of the box, so it is easy to set it up and start using it. The steps below describes what you need to do.
1/3: Stop WSL
First, stop your WSL application (Ubuntu) if you have it running in order not to cause any problems during the installation / setup phase.
2/3: Install Docker Desktop for Windows
Visit the official Docker website's Get Started section. Download and install Docker Desktop.
While installing Docker Desktop, the easiest is to install it for your user. That automatically enables WSL 2 support, which should be enabled in the installation. If you install it for all users, then make sure that the WSL 2 support is enabled.
EXTRA STEP: Only for Windows 11 Users
Docker does not work without administrator rights. To fix that:
1 - Open the PowerShell application as an administrator.
2 - Determine your username with the command:
This should output users for multiple roles, including category DefaultAccount and under it should be your username. For example: aleksi.
3 - Now run the command below to add your own user to the docker group (REPLACING ALEKSI WITH YOUR OWN USERNAME):
3/3: Verify WSL 2 Configuration
This should be enabled by default, but let's also verify that the WSL 2 support has been enabled for Docker Desktop.
To do so:
- Open Docker Desktop
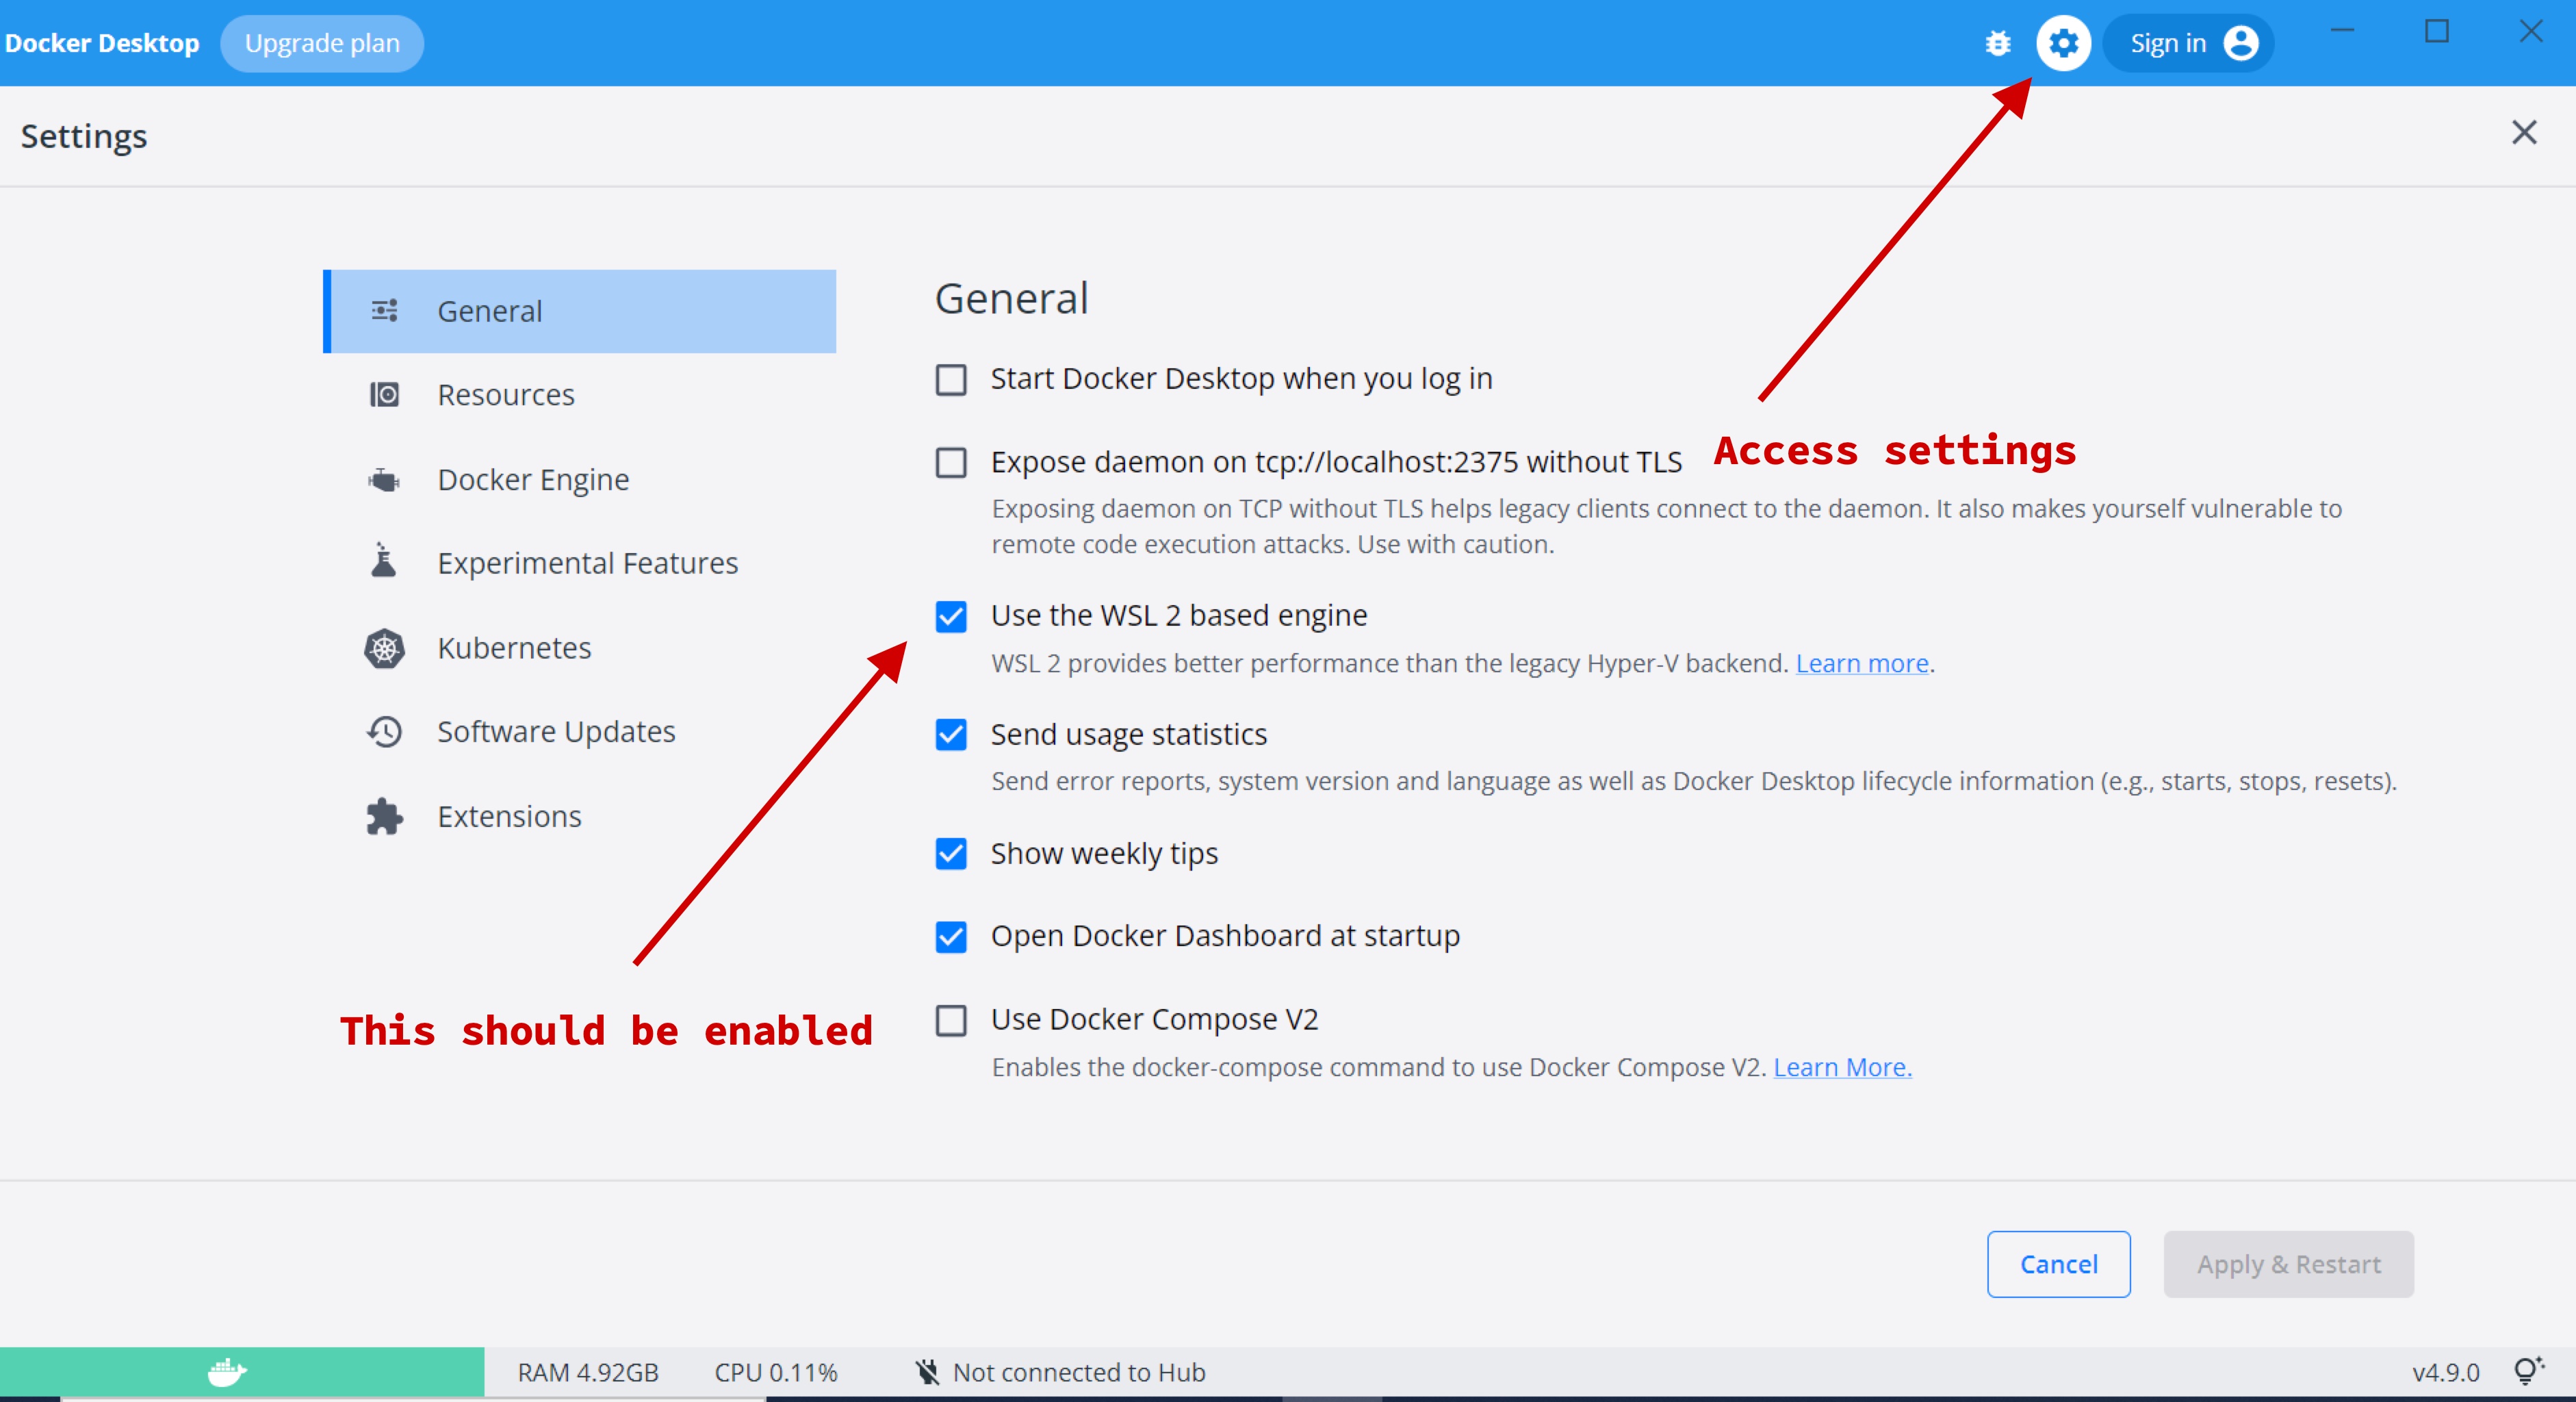
- Click on the settings (cog) icon on the topright corner, or whenever that is to access the settings menu
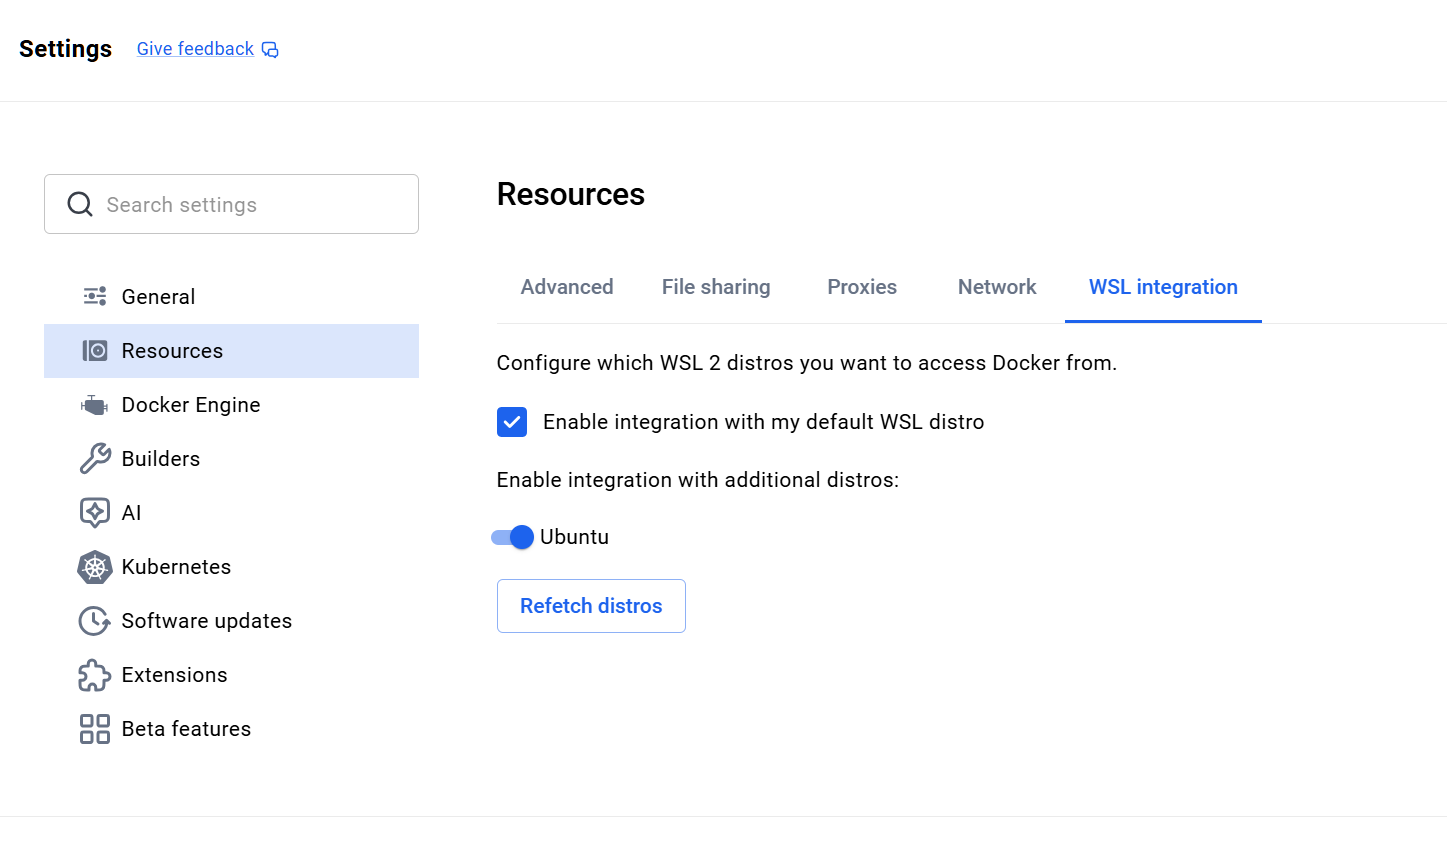
- Latest version of Docker Desktop: From the General settings, verify that the option "Choose how to run Docker containers" is set to WSL 2 (later Docker version). Verify also that in Resources > WSL Integration you have enabled the support for default WSL distro, and you have selected the Ubuntu distribution from there. Save changes if you had to modify these settings.
- Older version of Docker Docker: or in older Docker version verify that the option Use the WSL 2 based engine is enabled.
Latest Docker version: General tab in settings
Latest Docker version: Resources > WSL Integration in settings
Older Docker version
And that's it! You now have Docker enabled on your Windows WSL.
Info
Note that you need to start and keep the Docker Desktop running while using Docker.